|
Histogram: A graph of the distribution of tones in an image. Most digital cameras except for the most basic models will show you a histogram of your images. Its looks like the image below. Histograms are a better way of checking whether your image is over or under exposed. Sometimes your camera screen is too bright or too dim on the back of your camera. Also, if you are in bright sunlight it’s difficult to access your exposure. Look at the histogram! 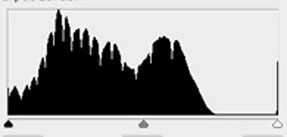 Correcting bad exposure… Below is an image of my grand-daughter that’s under exposed. Look at the histogram and see all the tones are piled up on the left towards black (black is on the left and white on the right). With a simple levels correction in your image editing program we can correct the exposure. If we move the little pointer below the histogram (white point) to the left, to the edge of the histogram it will bring that to white. The second image is after the levels adjustment. Most images will greatly benefit from a simple levels adjustment! You can also use the curves adjustment to do the same thing. Most image captures don’t go from true black to true white. But, you can make them by using the level adjustment! Just because you can doesn’t mean you should… Use you own judgment and creativity. 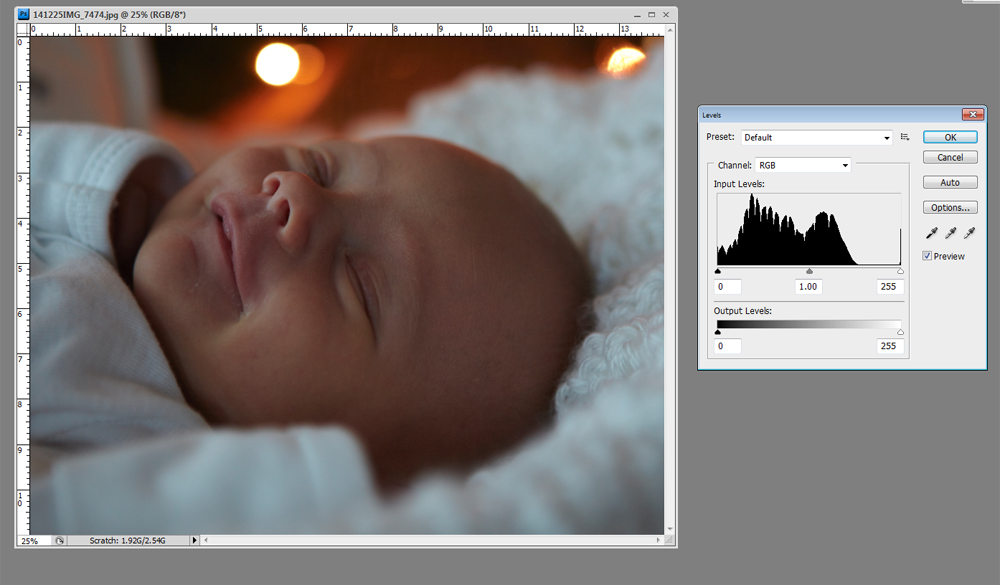 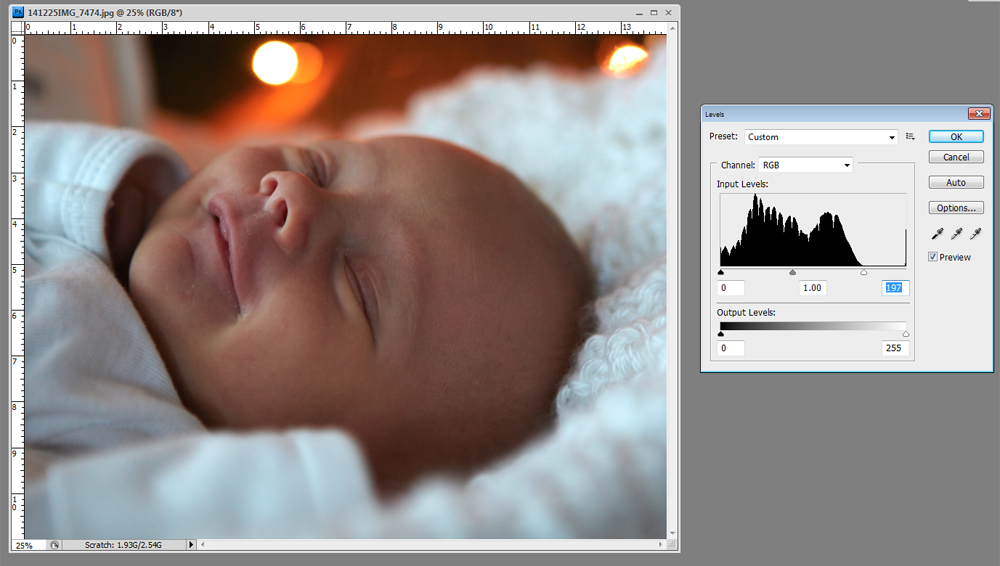 Play with the levels and curves in your image editing software! They are the single best adjustment you can make for a better image!
If you shoot it right you will not need to fix it later. Check your histogram while you are shooting. My Canon has a display screen that shows the histogram and the image at the same time. It also flashes in the blown out areas of my image to show the over exposure. Now get out there and take some great photos! Joe
1 Comment
Tip #4 Timing Henri Cartier-Bresson was a French photographer. He brought to light the idea of what he called the decisive moment, and his candid photography is amazing. Henri said in a fraction of a second, of the significance of an event as well as of a precise organization of forms which give that event its proper expression. Timing is everything to photography! Being an architectural-street scene kind of guy this is not as important on a moment to moment basis, as it would to be say a wedding photographer. I time my photographs based on when would this building have the best lighting on it. Simple as this is, you have to be there when the time is right and you are there to capture it. That time was usually when I did not want to be there either... Usually for me it was late at night, early in the morning, foggy, rainy, etc. But, It was the right time to be there for the shot. Take the time to study your subject. Photographers call it working the subject, capture images from a variety of angles, distance, lighting. And, always shoot "loose" when covering your subject, you can always re-crop the image later if needed. You can't add back something off your frame. When covering a subject take the time to take a good photograph, don't just blast off some frames because you can.. Check your settings, aperture, crop and shoot several with different settings. With my subject buildings, I have time to shoot without being rushed so much. I really don't want people in my photographs. It dates the image what ever the people are wearing date the image. I took the image below "Sunday Morning" at 1:30am in the morning down by Jackson Square in front of the church. There were two people hanging out and right before walking away they huddled up under the street lamp and kissed. And yes, I was there to capture it! Score! 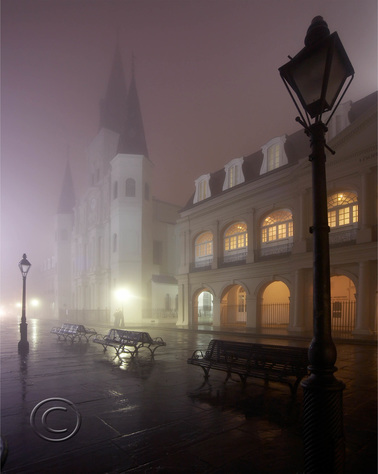 "Sunday Morning" by Joe Dunn BTW, when photographing anything set your camera to it highest image quality setting! These no reason not too! Memory is cheap.
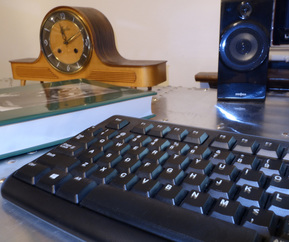
Try this great little app called LightTrac. It will show you where the sun will be, at any time, at any place on earth. Also, sunrise/sunset information and more! Tip #2 Depth of Field This to me is one of the most important principles in photography! Photography has some limitations. Depth of field is one of them. Simply put, depth of field (DOF) is the area in your photograph that is in focus. By adjusting the aperture (the lens opening) on your camera you can vary the area of focus in your image. Below are two images shot at two very different apertures. The first one is shot with the lens wide open (letting in a lot of light) which produces a very narrow DOF. The second one shot with the lens stopped down (which lets in very little light) which produces a deeper DOF. Notice in the first picture the clock in the background is very out of focus. In the second image it's more clear.
If you are not a photographer you might ask why is this important? Here's another example of a portrait image where a shallow DOF is used to make a better image.  Photographs by Joe Dunn In portraiture you want the subject in focus but nothing else. In the above image the foreground and the background are out of focus which draws your attention to the subject! Which is my grandbaby Ari! By using the aperture priority setting (A) on your camera, you control the lens opening which determines the DOF in your photographs. Lens opening is expressed in f-stops. The lower the f-stop (i.e. 1.8, 2.0, 2.8) the wider the lens opening. The higher the f-stop (i.e. 16,22,32) the smaller the lens opening. When using the aperture priority setting (A) on your camera, you set the aperture and the camera sets the shutter speed automatically. Your camera will give you a correctly exposed image. But, be aware that anytime you stop down the lens (higher f-stop) you need a slower shutter speed because you are letting in less light with each higher f-stop. As long as you keep your shutter speed above 1/60 th of a second you can hand hold it. Speaking of higher f-stop there are times when you want everything in focus then use a high f-stop like in the image below. Notice everything is in focus in the image.  Vernazza If you have any questions please leave me a comment, and I will try to answer it!
Joe I have a blog! Wait what? My new website has blogging functionality, Whoo hoo! I would like to use this to help all of you to be able to take better photographs. I can share some basic principles of photography with you, and immediately your photos will look better than ever! These tips and tricks are things that anyone can learn. Photography is not rocket science! It is however some physics, and basic mechanical knowledge. Hey, if I can learn it... Tip #1 Rule of Thirds Divide your image into thirds like the graphic below. Tic-Tac-Toe right! Now, place your main point of interest at one of the intersections (like the bench), instead of centering it. Stupid simple! This makes for a more visually pleasing image that if you were to center it. Your eyes naturally focus on the intersections better than the center! However, some compositions just scream to be centered. Rules were made to be broken.... Joe 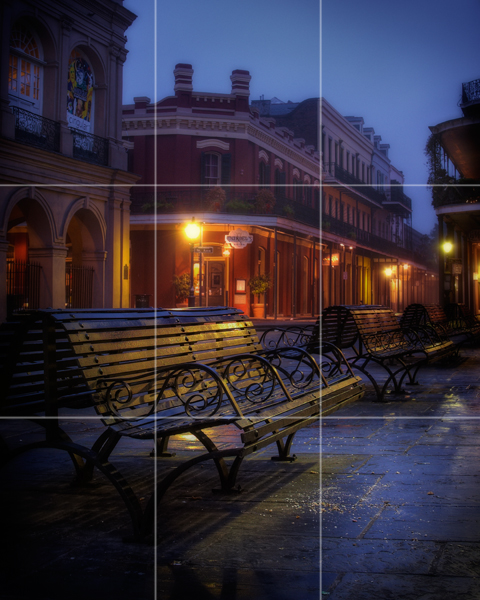 Image by Joe Dunn.
|
Joe Dunn
Artist / photographer Archives
July 2023
Categories |

 RSS Feed